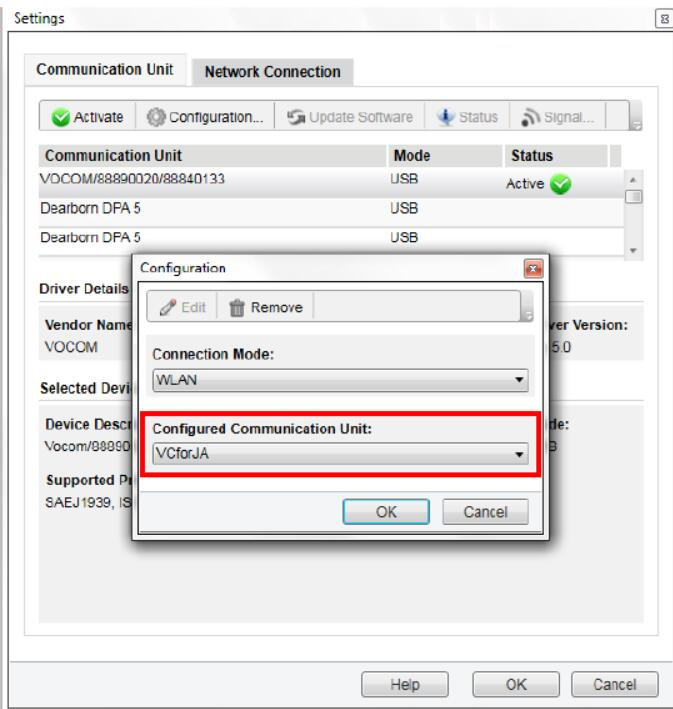
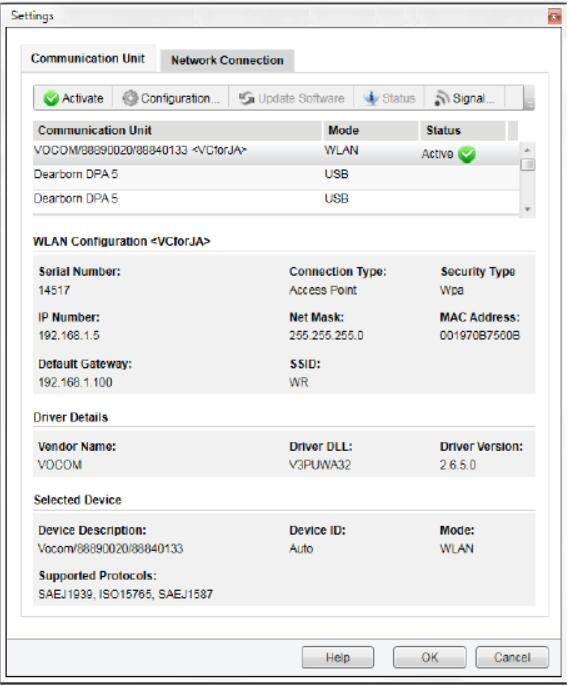
This article show a guide on how to configure a Volvo Vocom Interface to WLAN wireless mode using an access point.
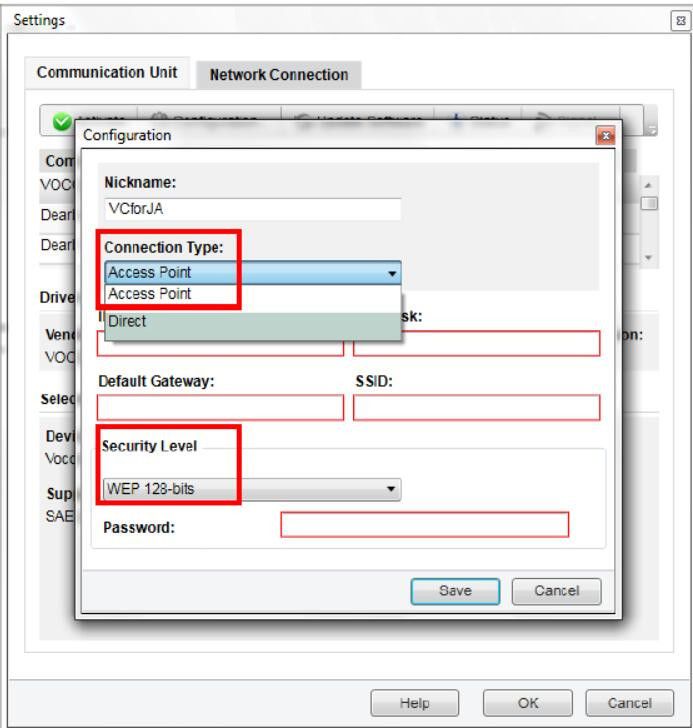
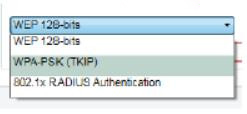
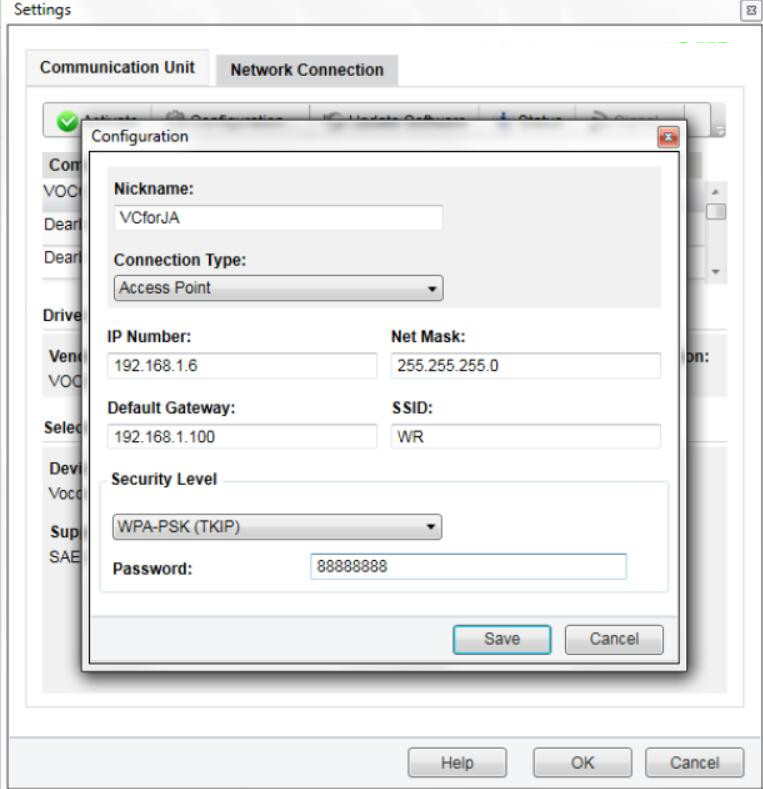
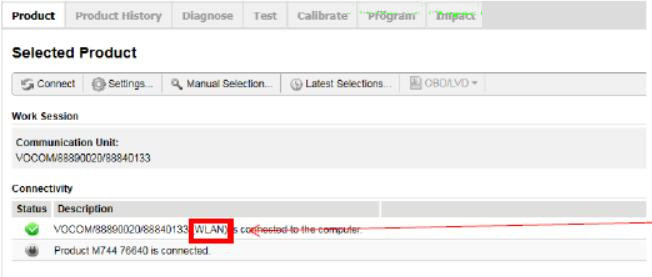
Procedures: Step 1: Connect VOCOM unit/cables to the PC and a Vehicle (key off). Step 2: Click the “Settings” button. Step 3: In the Settings menu click the “Configuration” button. The Configuration window will open. Select WLAN. Step 4: To identify the configured communication unit. Enter a name of your choice and select OK. (ex. Garys_Adapter or VCforJA) NOTE: If you have more than one VOCOM, each will require a separate configuration and name. If the connected device was already configured, a confirmation message will pop up asking if you want to load the configuration or set up a new configuration. Step 5: Make a selection here for your configuration. Step 6: Under Connection Type choose “Access Point”. To complete the configuration, the IT person will be required to enter the data. This is the data required for the VOCOM to connect to the Wireless Router. Step 7: Click “Save” to complete configuration setup. NOTE: In the drop down there are 3 different Security Levels to choose from. Example: This is an example of a completed configuration for the wireless router that we used. Your configuration will need to be set according to your location’s router. NOTE: The example used a different Security Level. Your configuration will vary depending on your network environment. Step 8: Select the newly configured VOCOM WLAN (mode) Communication Unit. Click the “Activate” button and then “OK” to close the “Settings” window. Step 9: Unplug The USB cable and the VOCOM will be in WLAN mode. NOTE: On the Product page you can see the VOCOM is now connected with the (WLAN). When the USB cable is plugged into the PC, the VOCOM will revert to USB mode. Done! If you need more about the latest Auto Scanner Tools , please visit our website : https://www.autonumen.com .
First when you get the software, the following steps and notes for you to install it:
Step1: computer system requirment: windows XP or Windows 7 operate system.
Step2: Remove the antivious Program from your computer
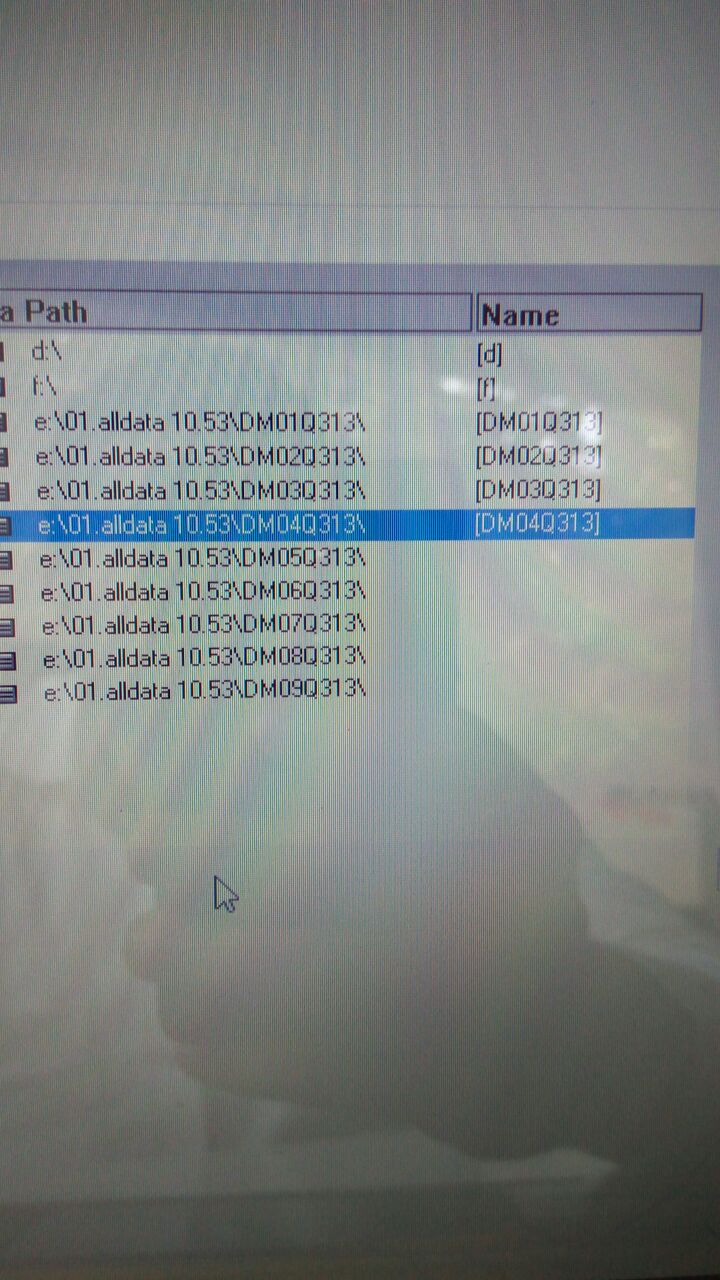
Step3: open the alldata software from the HDD, then there is a video for you how to install the software step by step.
If you install the software and appear the below situation: Then click ok to close, then will be ok. Now the alldata and mitchell ondemand 2 in 1 are with best price.
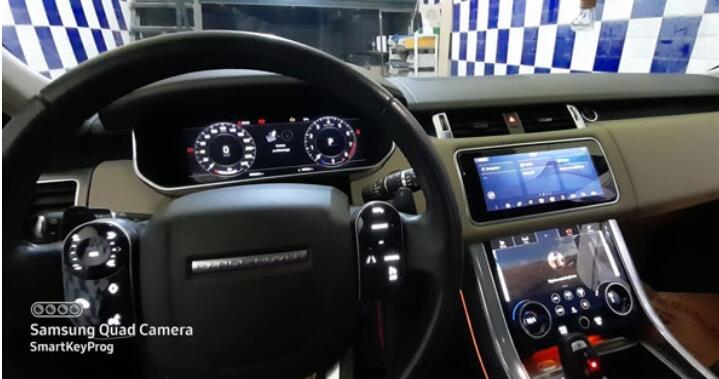
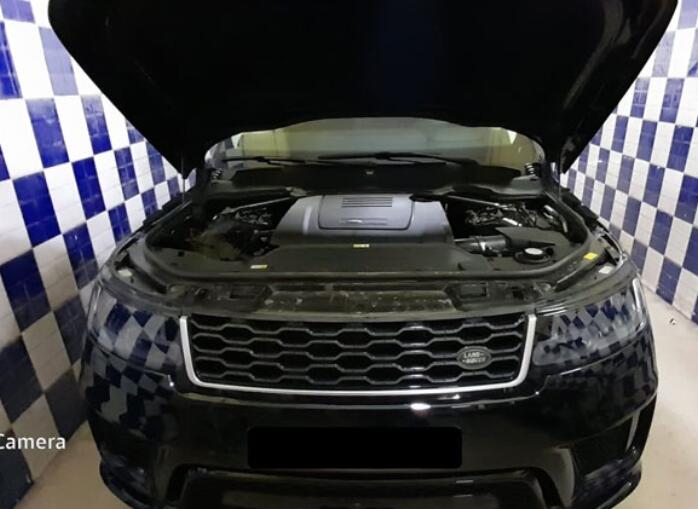
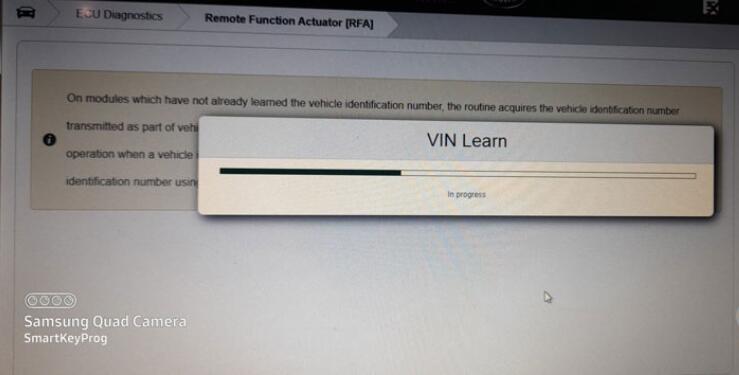
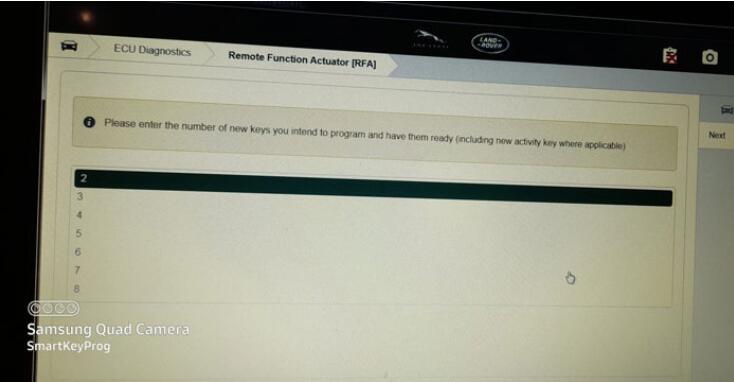
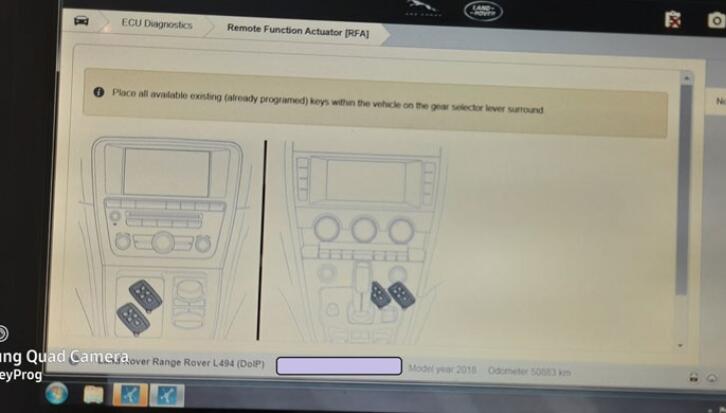
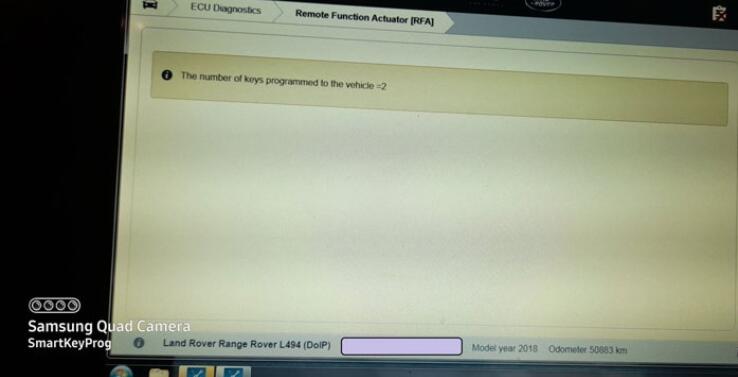
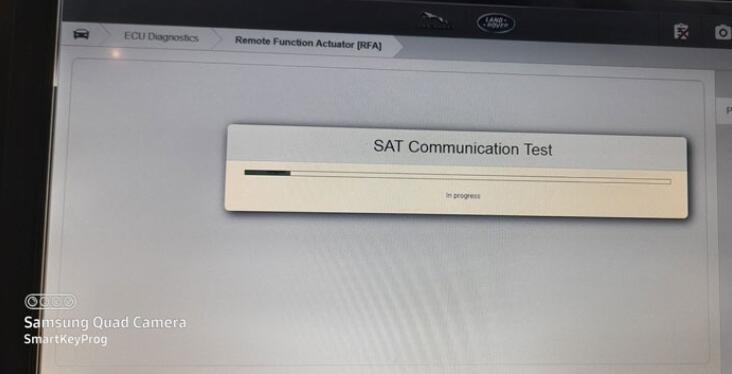
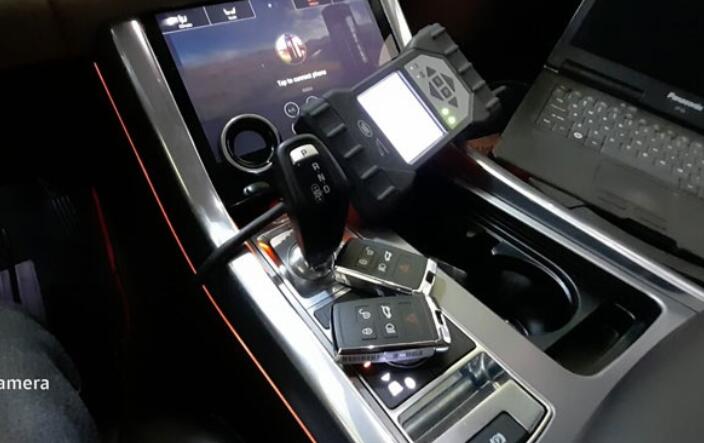
Test feedback today: New Range Rover Sport P300 (L494) year 2018 successfully added the smart key with original JLR DoIP VCI Pathfinder interface. The real JLR DoiP VCI costs $1300 more. You might get a vxdiag JLR DoIP (less than $600 with HDD) that will do the same job.
Trust is everything, we have been been supplying systems globally for nearly 10 years. Trusted by many Porsche Independents & Specialists all around world.
1 YEAR WARRANTY It’s all about warranty. Hassle free ownership.
LIFETIME OFFLINE LICENSE We provide lifetime offline license for our Piwis systems. No need to buy expensive monthly suscriptions.
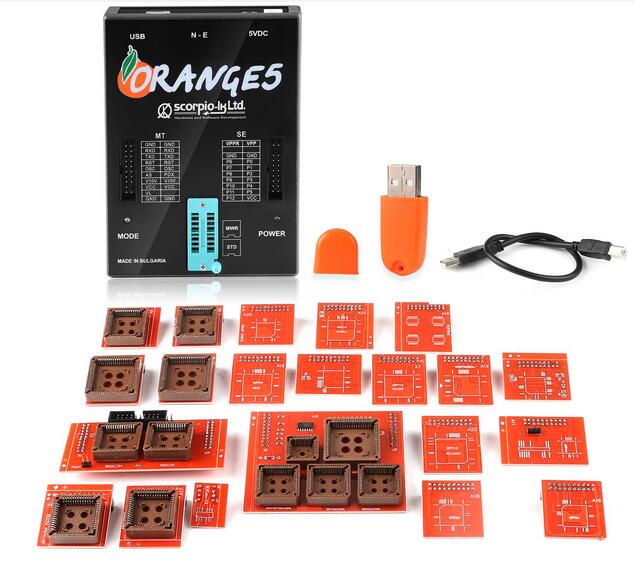
Orange 5 super pro programmer is a professional programming device for memory and microcontrollers. Unique feature of the current series programmers is built-in macro language for writing down protocols, which gives fast and easy capability to add new types of micro schemes, precisely meeting manufacturers’ requirements to read/write algorithms.
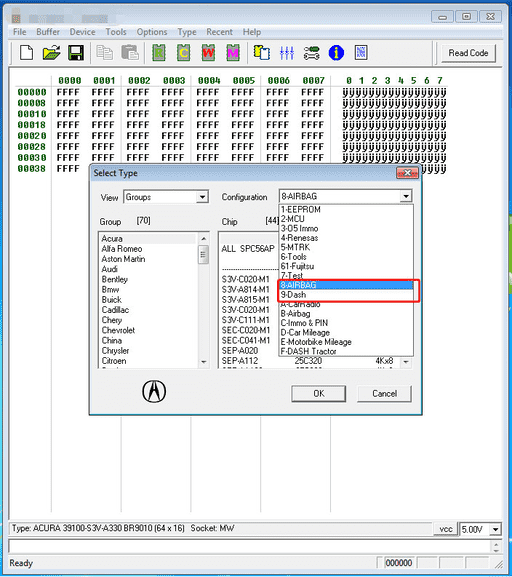
Software Version:V1.36 and orange 5 super pro v1.35 full function. Language:English,Russian Systems:WIN XP/WIN7 (32bit and 64 bit) Note:Dongle use to 08-airbag and 09-dashboard moudels.
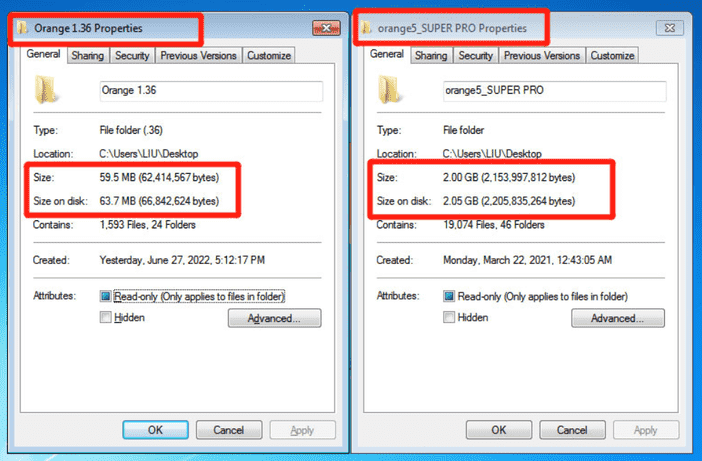
Orange5 Super Pro Burst Points: 1. Adds new licenses : 08-airbag and 09-dashboard, A-car radio, B-airbag, C- immo&pin, D-car mileage, E-motorbike mileage, F- dash tractor 2. Adds more Renesas licenses for H8SX, HD64F, V850 UART, V850 SPI, RH850 V3, RL78 than others 3. Send orange 5 v1.36 software as a gift. Support more scripts and Wiring diagrams, v1.36 just about 60MB ,but super pro is 2GB .
4. With USB Dongle. Dongle uses 08-airbag and 09-dashboard moudels. orange5 super pro uses 08-airbag and 09-dashboard
Software Licenses: MTRK (Included in Orange-5 base) TMS (Included in Orange-5 base) M08V NEW Immo HPX 9V0 NEC V850ES/SJ3 V850ES/SG3 UART NEC V850E2 NEW
The differences between orange 5 super pro and orange 5 plus:
Orange5 Technical Info: * USB power supply (USB2.0/3.0) * Universal easy to plug panel ZIF16 for EEPROM * Control of contacts in the sockets * Two expansions compatible with Orange4 and Omega MTRK * Protection against overcurrent * Overload voltage protection * Two types of power supply: Standart (USB) and enhanced (USB + external power supply) * Three 3 adjustable voltage and current control: Voltage of power supply ( 2.0…5.0V ), programming voltage (2.0…21.0V), additional static 10V for microcontrollers * High-speed bidirectional pin drivers with adjustable voltage (2.0…5.0V) * Wave cycle generator with frequency ( up to 24 Mhz) and out voltage(2.0…5.0V) adjustment * Capability of functional emulation of class CDC USB devices * Built-in 32-bit virtual machine * Supported interface: I2C, SPI, MicroWire, JTAG, UART, BDM, ISO7816, K-LINE (via adapter), CAN (via adapter) * Programmer is encolsed in a functional box. Supported working under Windows XP/7 32bit. [*Win8.1] – Installation and Work with Orange-5 under Windwos 7 and Windows 8.1 CnCterm – Terminal program for work with COM ports.
Feature: Supports any COM ports, including virtual ones from 1 to 20 Works with text (ASCII) and HEX mode Creating a list of commands that allows editing and fast sending Fine-tuning the exchange rate Saving files including command and port settings. Saving incoming data in binary files File transfer via serial port. Delay settings for bytes and blocks “Echo” mode Delay settings between incoming data Management of DTR, RTS chains, visualizing DSR, CTS, CD, RI The program doesn’t need to be installed Supports Orange5 programmer in emulation mode.
Packing List 1 x Orange 5 super pro Programmer 1 x TMS375C006/TMS370CX36/TMS370CX32/X42 A1 1 x HC05B/HC705B A2 1 x Adapter 11EA9/PLCC52 A5 1 x Adapter 908AS60 PLCC52 A6 1 x Adapter QFP112/9S12XE QFP80/9S12XE/9S12XS A7 1 x HC11A/EXX PLCC52 A8 1 x Adapter HC11F1 A9 1 x Adapter 908AS60/AZ60 QFP64 A10 1 x 705E6/705P3/05P3 A11 1 x Adapter 68HC11L6 A12 1 x Adapter TMS374C003A A13 1 x Adapter 05B/X_705B/X QFP64 V2 A14 1 x Adapter QFP112/9S12 QFP80/9S12DXX A15 1 x Adapter QFP64 A16 1 x Adapter 68HC05H12 A17 1 x Adapter QFP64/QFP80 A18 1 x Adapter PCF7941 A19 1 x Adapter 912B32 QFP80 A20 1 x Adapter 912Dxx A21 1 x Adapter 9S12HZ/QFP80 1 9S12XHZ /QFP112 A22 1 x Adapter 93CXX-14 1x USB cable
The Piwis 3 diagnostic tester is a new generation device. The device implements full diagnostics and testing of all electronic systems. The owner of the scanner will identify a car malfunction and its cause, program the electronic components of the car and perform several other tasks that will require repair or service. Use the piwis tester 3 manual to make it easy to work with the device.
Piwis tester 3 supports all models in the Porsche range and conducts different operating modes. The tester will allow you to work and diagnose with such systems as air conditioning, automatic transmission, engine, MPL, SRS, ASR, ABS, GM, KEYLESS-GO, standard alarm, and others.
Differences between Piwis 2 and 3
Unlike the previous modification of the Porsche Piwis 2, the modernized device updates the applicability of the auto scanner by updating the software and fault codes, and:
1.increased productivity;
2.modern user interface;
3.reset service intervals;
4.online programming;
5.demonstration of current data;
6.display of freeze frames of malfunctions with parameters at the time of the error;
7.carrying out a set of works on service maintenance of Porsche cars;
8.activation, deactivation of components;
9.the ability to browse technical documents online;
JCB Electronic Service Tool diagnostic interface is used for fast and effective fault finding, check maintenance standards, see if the machine has been abused, view and change machine set up data, flash ECUs with the correct data files. You can reset EMS hours, edit speed limiters and use other functions what require special unlock.
JCB Service Master is a gateway application allowing a large number of Vehicle Support Applications to be linked using one familiar interface. The interface acts as a graphical tool for selecting the target vehicle from a groups of Vehicle Families and triggering the particular Service Tool Application desired. This removes the need for a user to ‘remember’ every individual service tool available and select which one if intended for a particular machine.
Top 10 Best JCB Diagnostic Kit In 2022 | JCB Electronic Service Master Tool.
01. V21.2.6 for JCB Diagnostic Kit JCB Electronic Service Tool JCB Excavator Truck Diagnosis KIT+JCB service parts pro SPP Software
02. JCB Service Master Spare parts CF19 laptop+ +jcb diagnostic scanner tool JCB Electronic Service tool full set
03. Laptop CF52 CF-52 diagnostic tool for JCB Electronic Service Tool JCB ServiceMaster Data Link Adapter DLA
04. Excavator Diagnostic Tool for JCB Electronic Tool DLA Master Agricultural Diagnostic Scanner with CF 19 Laptop
05. Agricultural Construction equipment for JCB Electronic Service tool (DLA) JCB ServiceMaster heavy duty truck diagnostic tool
06. Heavy duty equipment Truck Diagnostic tool for JCB diagnostic v1.73.3 kit JCB Electronic Service diagnostic scanner tool
07. for JCB Electronic Service Master Tool Interface heavy duty truck excavator tractor diagnostic scanner tool
08. Excavator Diagnostic tool 1.73.3SPP for JCB Electronic Service tool for JCB ServiceMaster Excavator Agricultural Diagnostic
09. Diagnostic tool for jcb electronic service tool Construction equipment + JCB parts pro SPP Software
10. for JCB DIAGNOSTIC KIT (DLA) JCB Service Master Spare parts JCB Agricultural construction Diagnostic scanner tool
Before starting any work, make sure you are following all the necessary safety guidelines to ensure the vehicle is in a safe location for work. The parking brake is applied and the wheels are plugged Also don’t forget to connect the battery charger.
Please note that due to the release of the updated 4.4 driver included in the security upcoming vocom, the technical tool must be manually configured to use the vocom mini or vocom tuff. This is scheduled to be corrected later Techtools, Post Change the device used Techtools Open vocom, Configurator app menu and select Map with 4.
The Update Device ID slot is the only one currently available with techtool.
When you want to use vocon mini, expand ID 3’s device, menu, select mini and when you want to go back select save using vocom, tuff opens, id3’s device menu select hard again and select save vocom configurator app is located at The vocom2 folder of the start menu once the vocom device is connected.
If there are any software or firmware updates available, they will be loaded automatically.
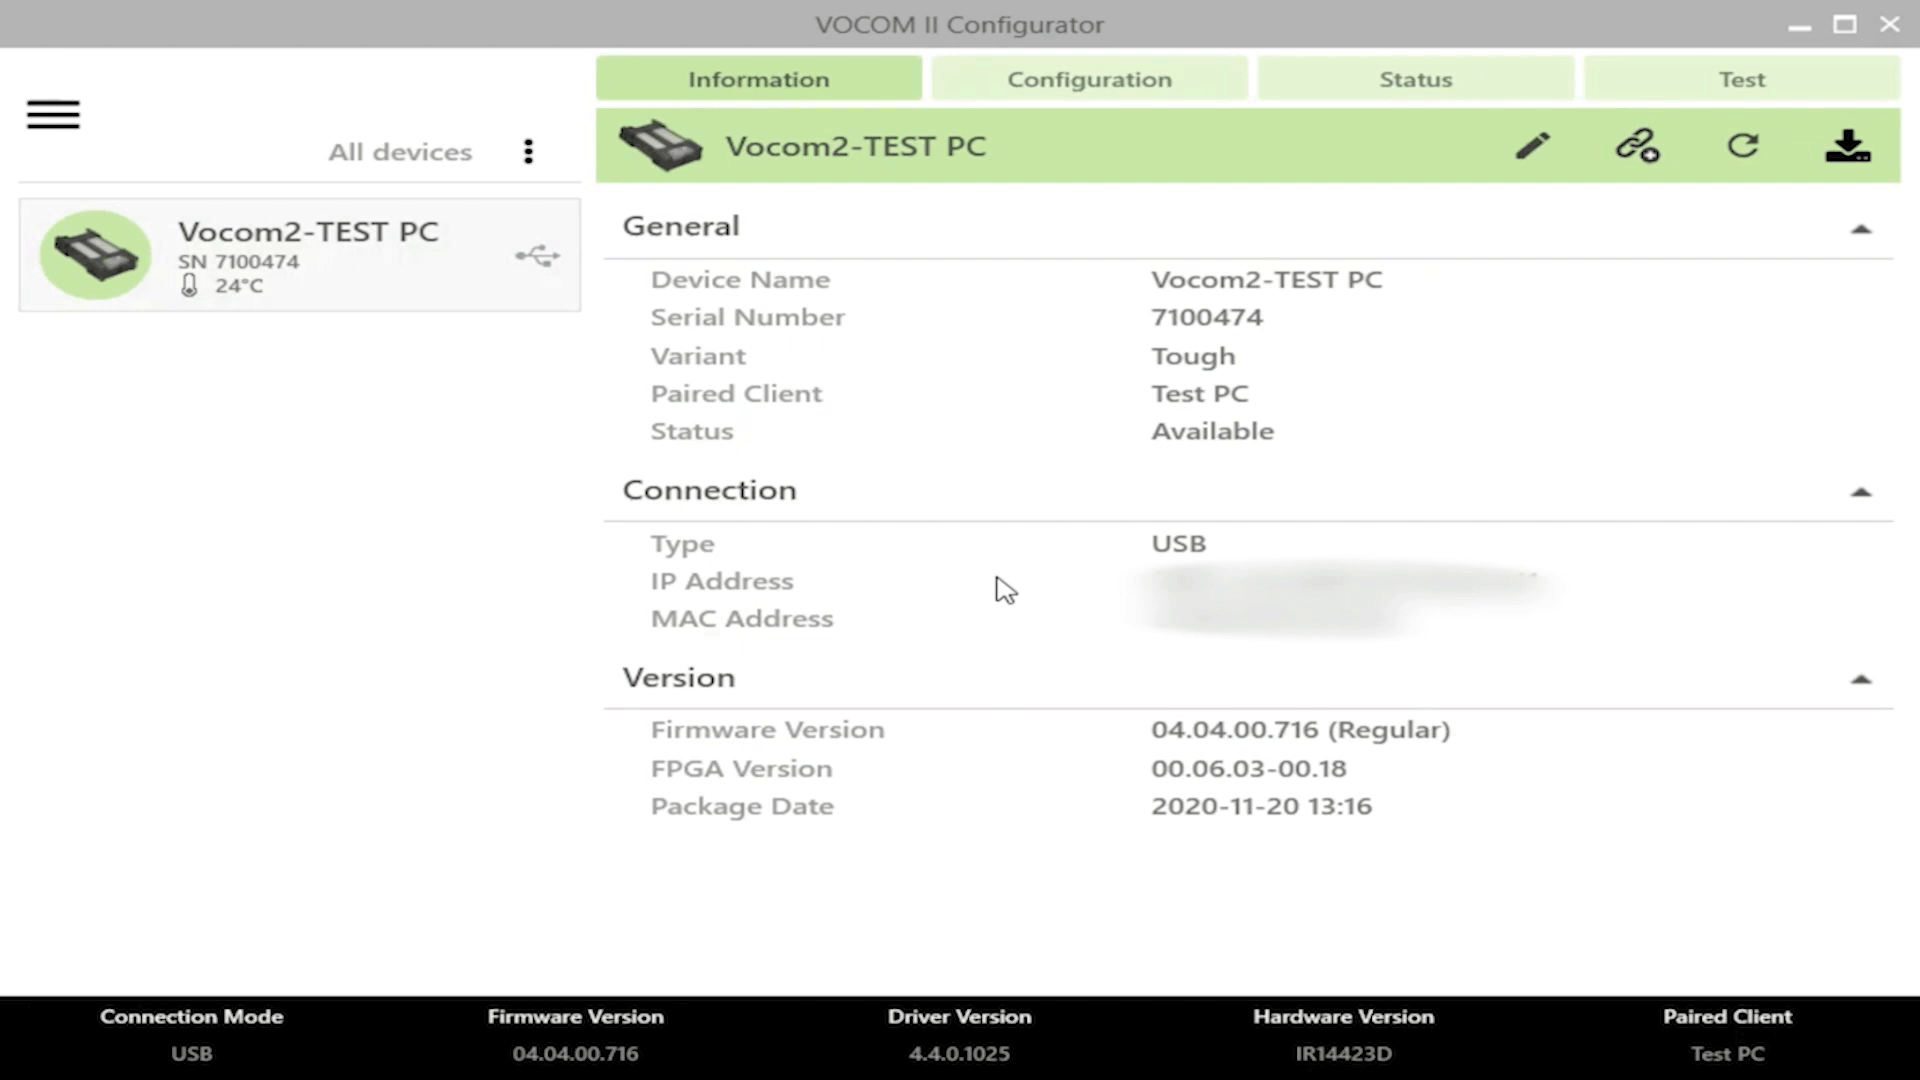
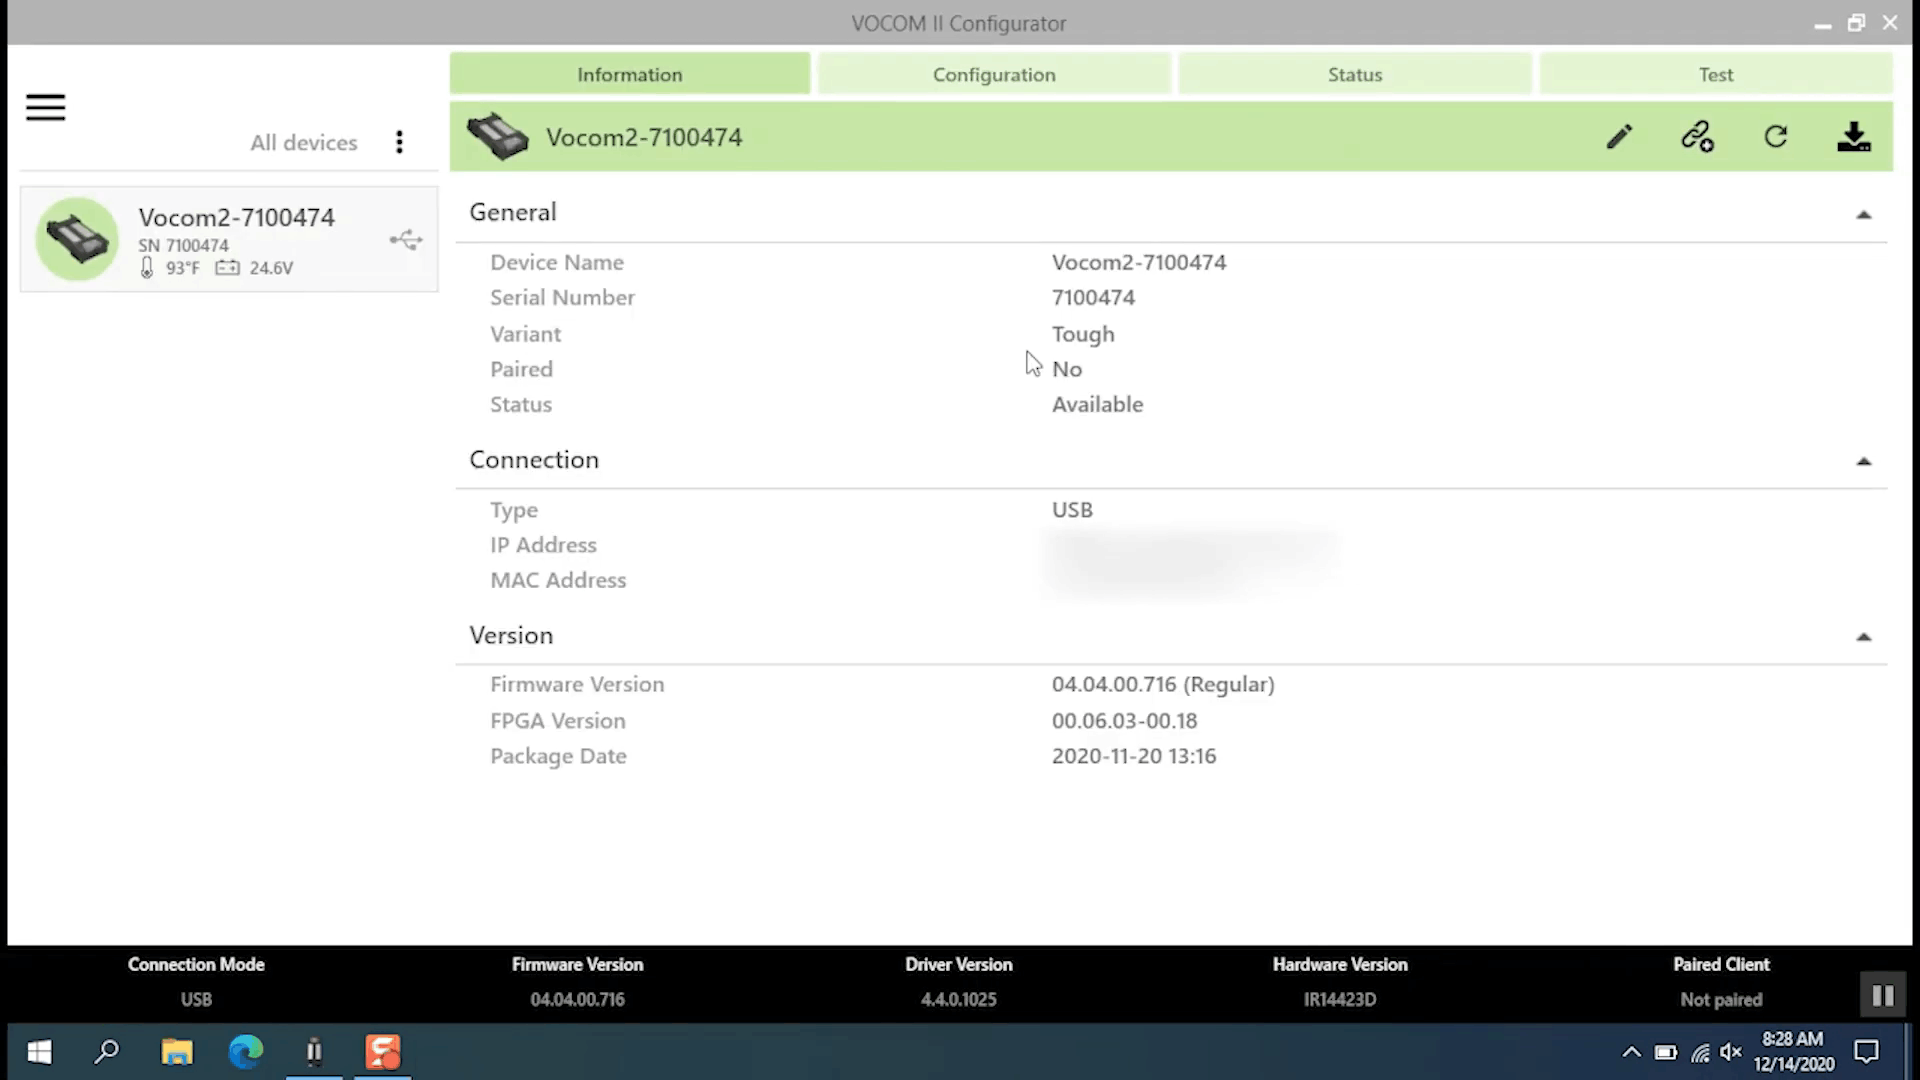
Please note that the device status must show Available for update. Let’s take a look at the Info tab. Once the vocom device is connected. We have the device name, serial number, number, a variant in this case, a vocom2tuff to which computer it is paired and you can see that it is not currently paired with any device.
for normal operation. A vocom device must be paired with the computer you are using before we proceed. Let’s pair this device to this computer Select Pair Device. Next enter the name of the paired device.
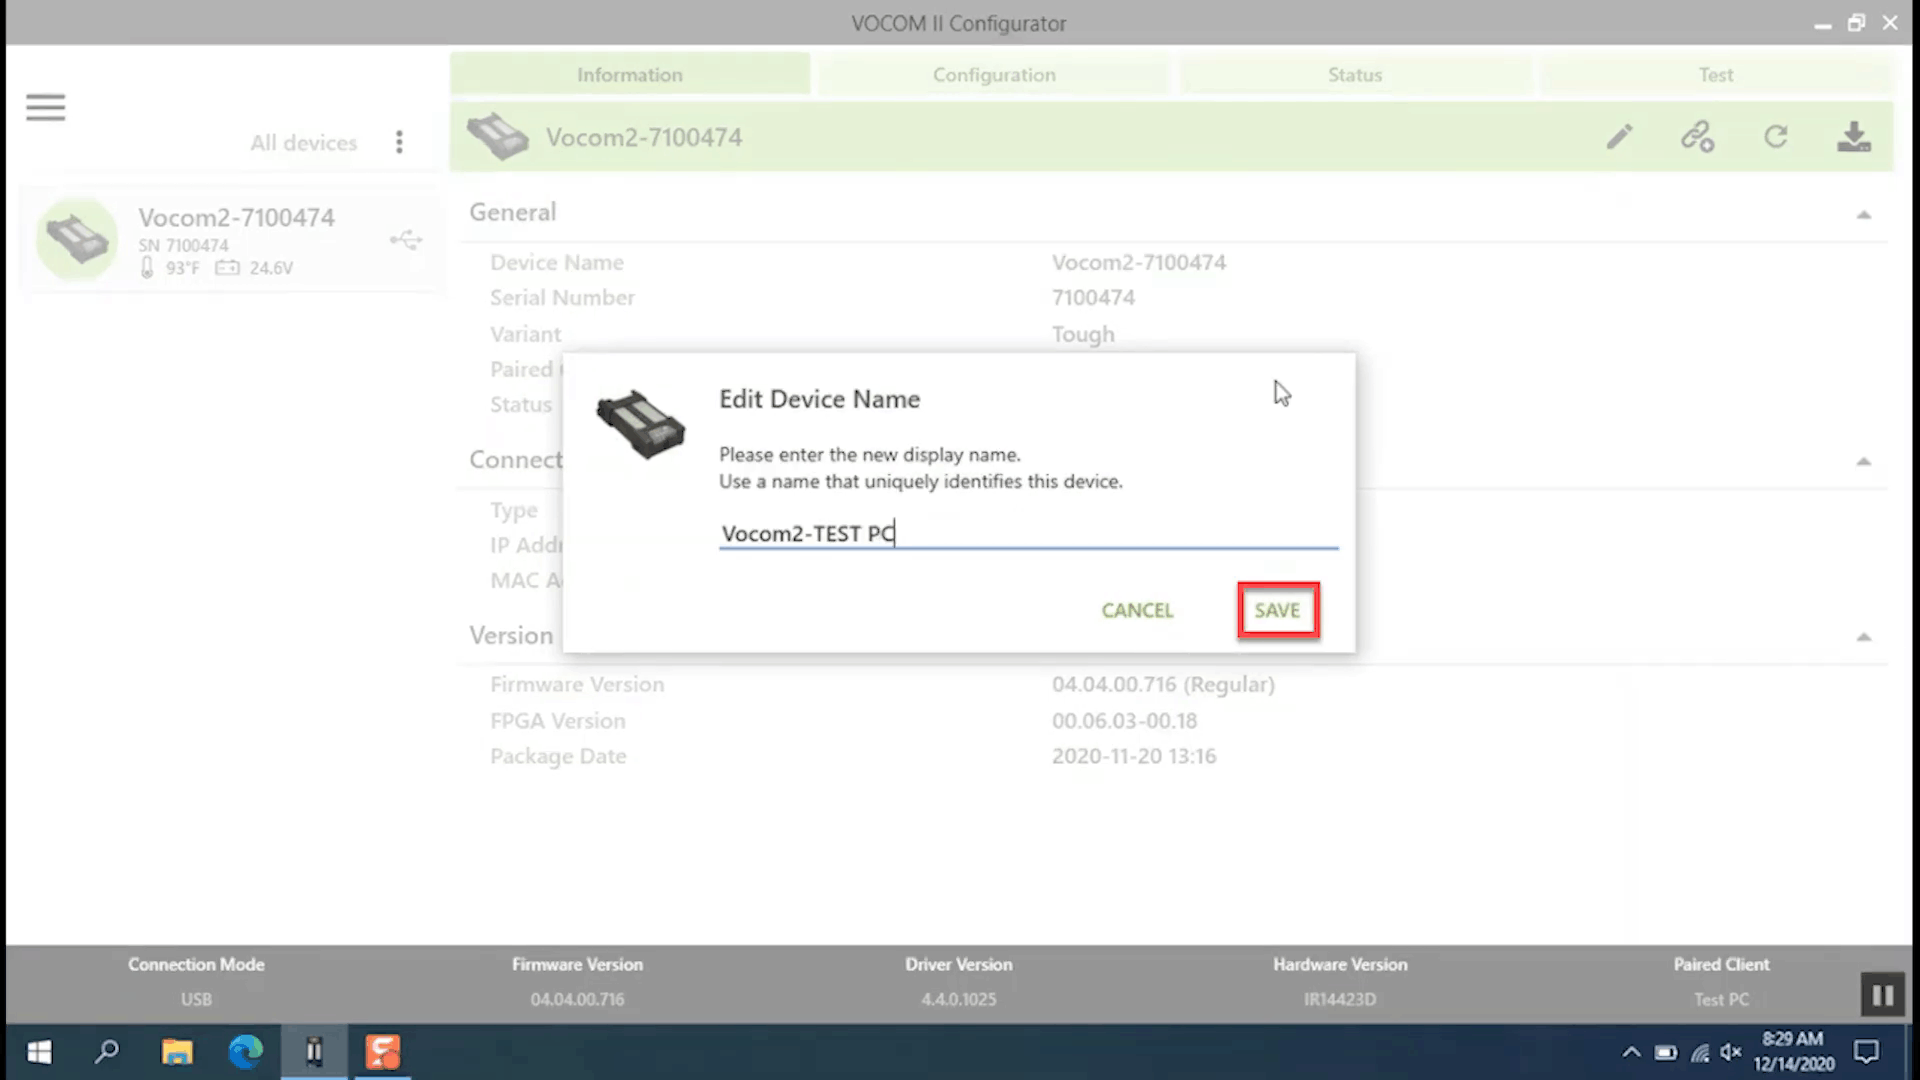
We recommend using your tech tool, client ID or unique name to easily identify which computer it’s paired to and then select Pair to finalize another way to help identify which device you’re using is to rename the vocom to rename a vocom Select Edit Input. Unique name and then select Save done with updated name until you see Device restarted.
Then select Save to finish.
Now we have paired the device.
Let’s continue here we can see the status of the device If the status shows that a technology tool is being used or another program is using the device, please note that while using the device, you will not be able to modify its settings like configuring it for wireless communication Or install the update under connection.
We have information on how to connect the vocom to a computer, in this case wirelessly via USB, the information is a bit different. It shows the ip and mac address used to connect to the device. Wireless network, the device is using the signal. Wireless Strength Network and Wireless Network, Security Type Under Version is the device’s software and firmware information. Next, let’s take a look at the Configuration tab.
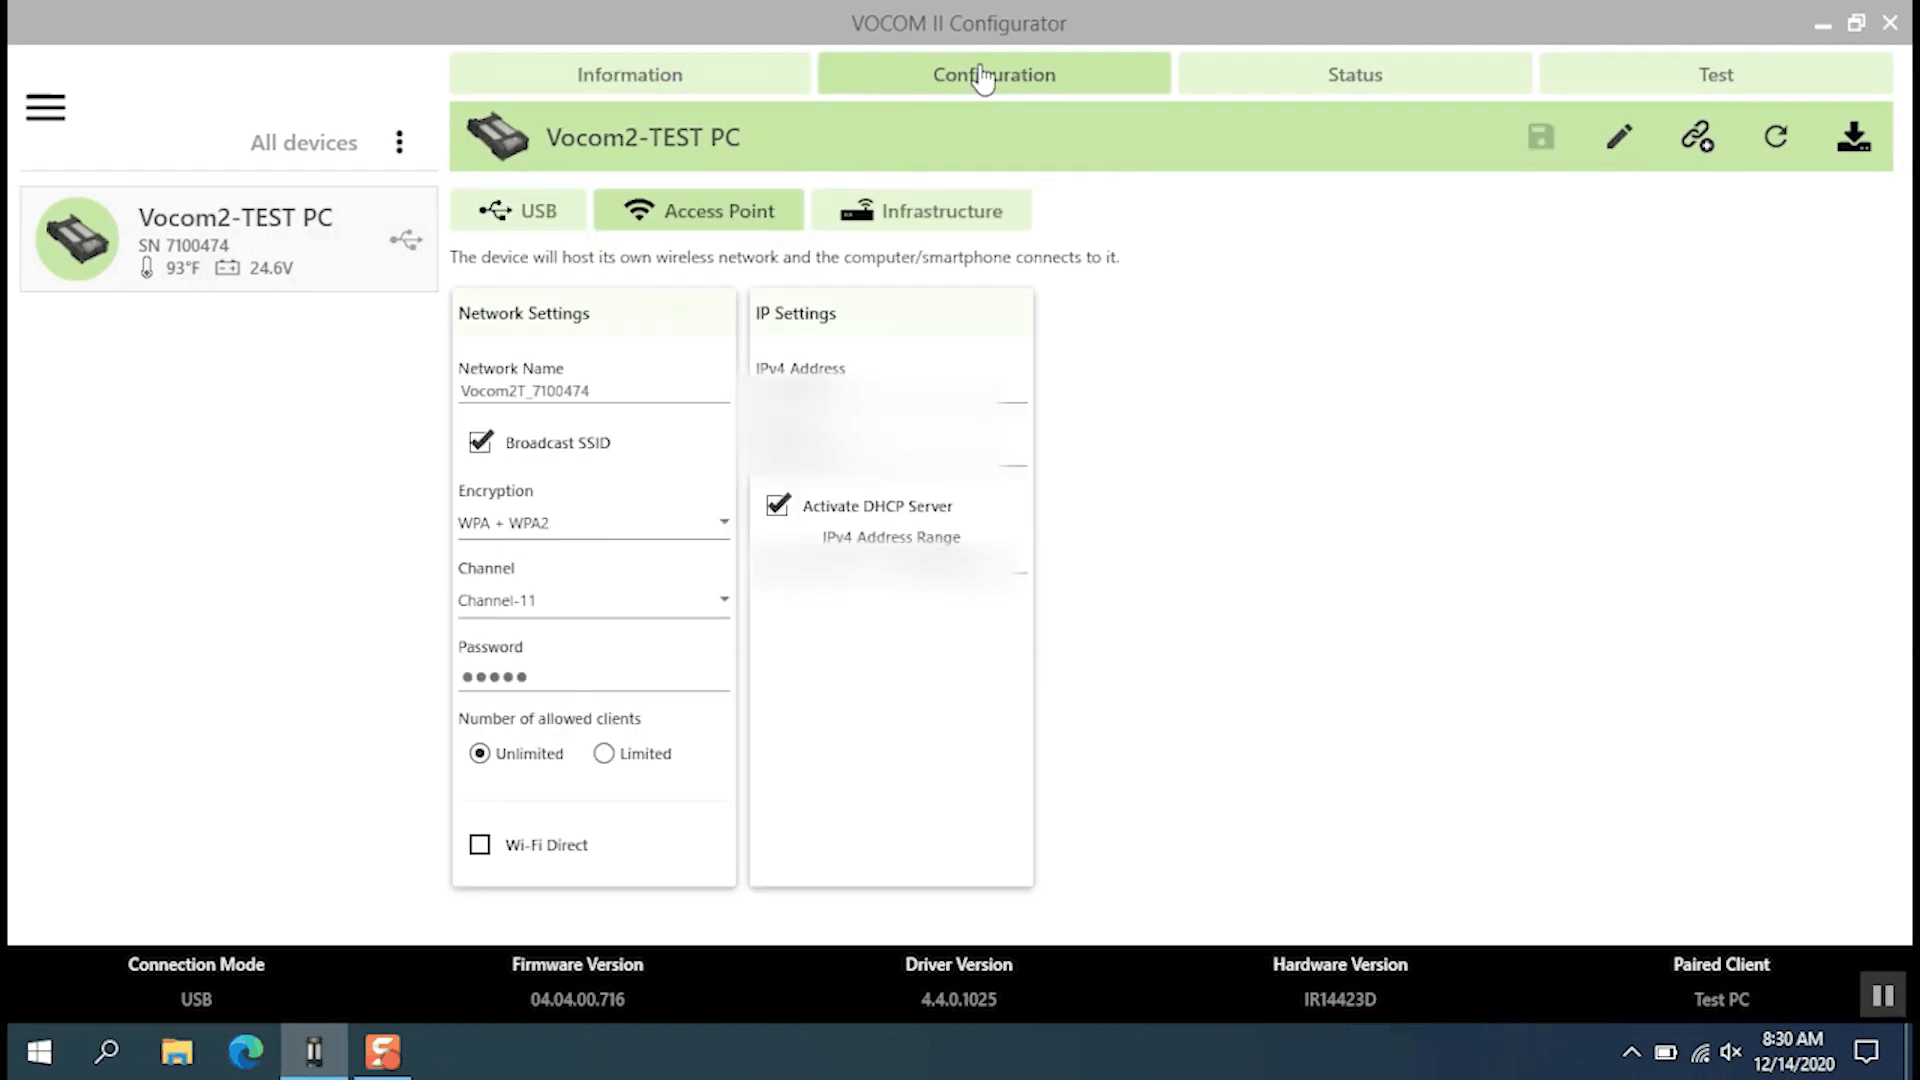
This area is used to modify the way the device is.
This area is used to modify the way the device is connected to your computer, the USB settings configure the device to only communicate via a USB cable access point configure the device to communicate directly with a computer without an internet connection Great for test drives and infrastructure settings to configure by using device your internet wireless.
NOTE: We have a separate video explaining how to set up the wireless vulcan mini’s features and tough, for now, let’s look at the Status tab.
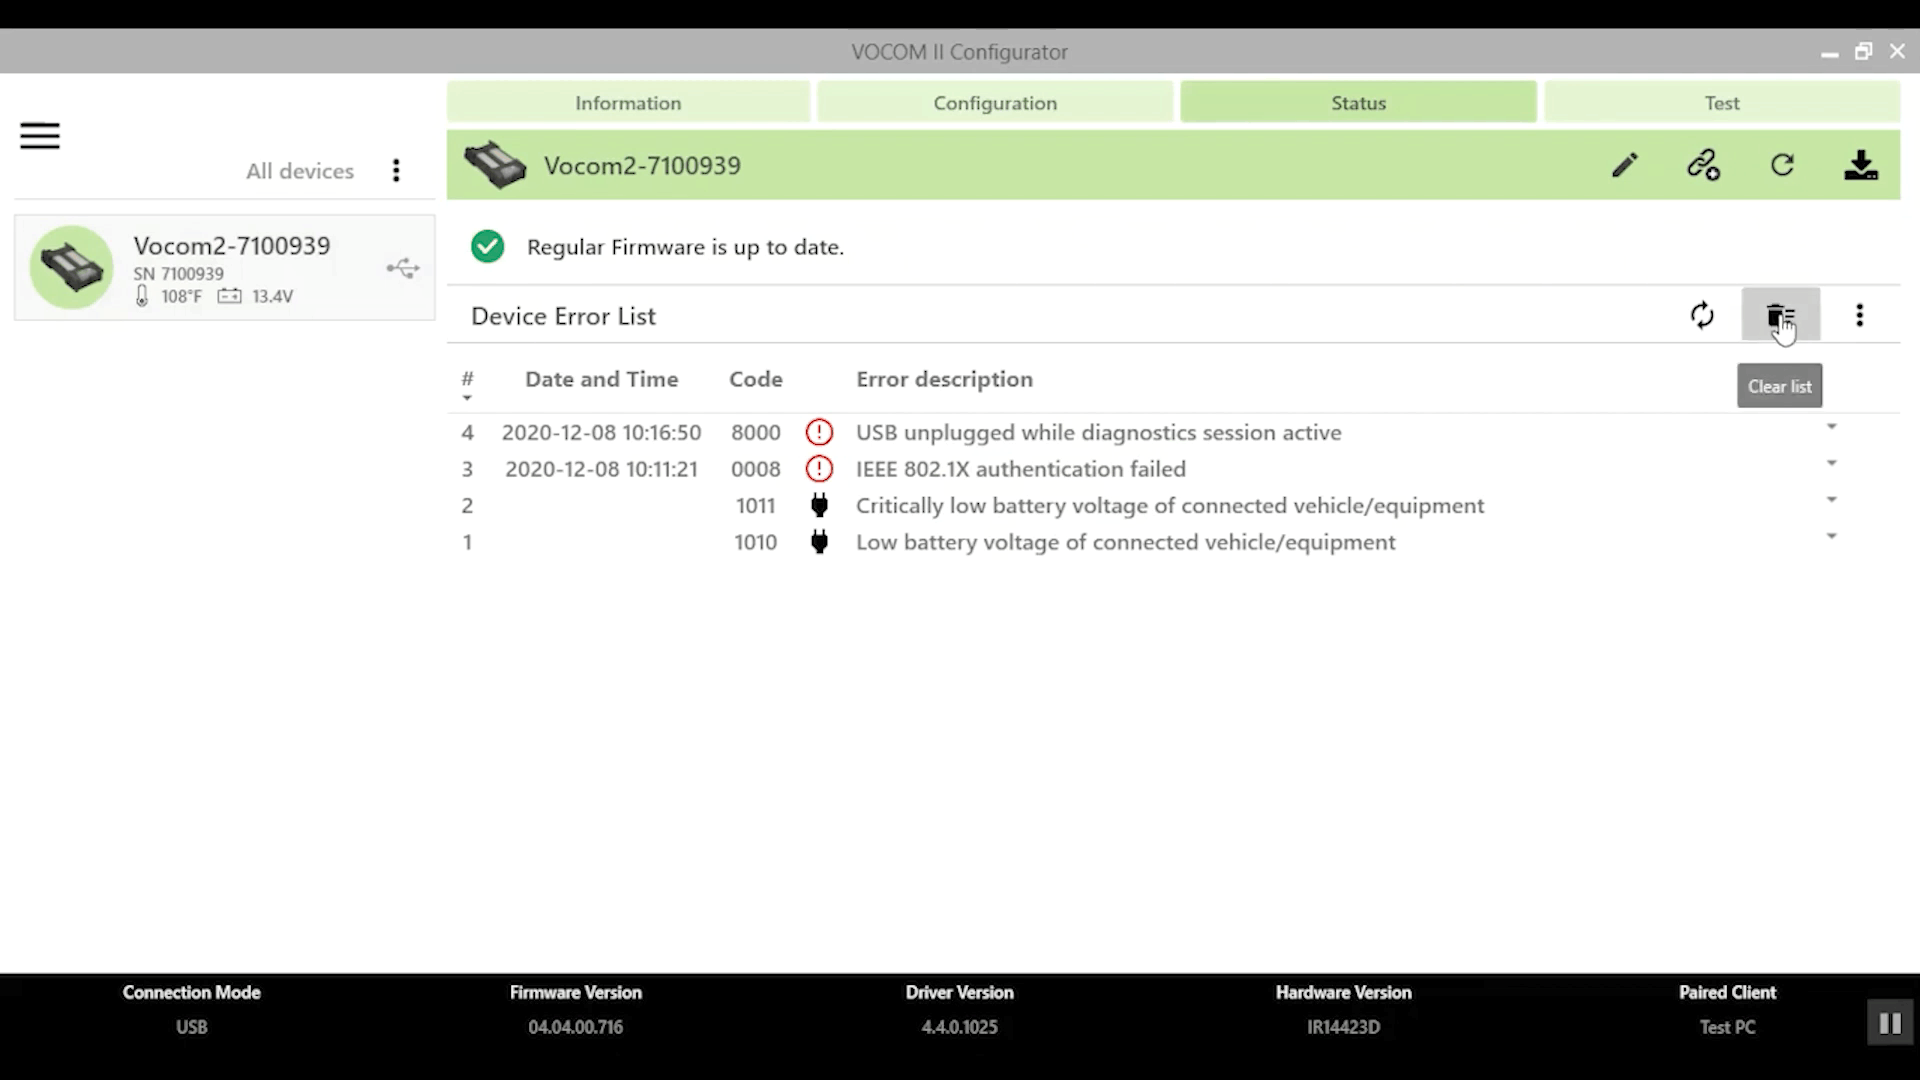
This section shows if the software and the firmware of the device are up to date and if there are any stored error codes. When an error code is stored in the device, you will see a red light like this. On the vocom tuff and mini, let’s review some of the more common error codes, there is low battery voltage, which is set around 12.3 volts, and very low battery voltage, which is set around 11.5 volts. So please keep the battery charged The next IEEE 802.1x authentication fails. This indicates a problem with vocom’s wireless connection: please contact your local IT department or dealer system administrator. If you can’t correct this yourself and the USB is unplugged while diagnosing session active it shows that the vocom is unplugged from the computer while in use. None of these codes indicate that the vocom device is malfunctioning. If you want to run a red light and leave, select Clear List and the code will be DELETE.
remove.
Now, let’s take a look at the Tests tab here. Communication tests can be run to make sure the device is communicating correctly with the vehicle. The last thing we’re going to look at is the Configurator Settings menu.
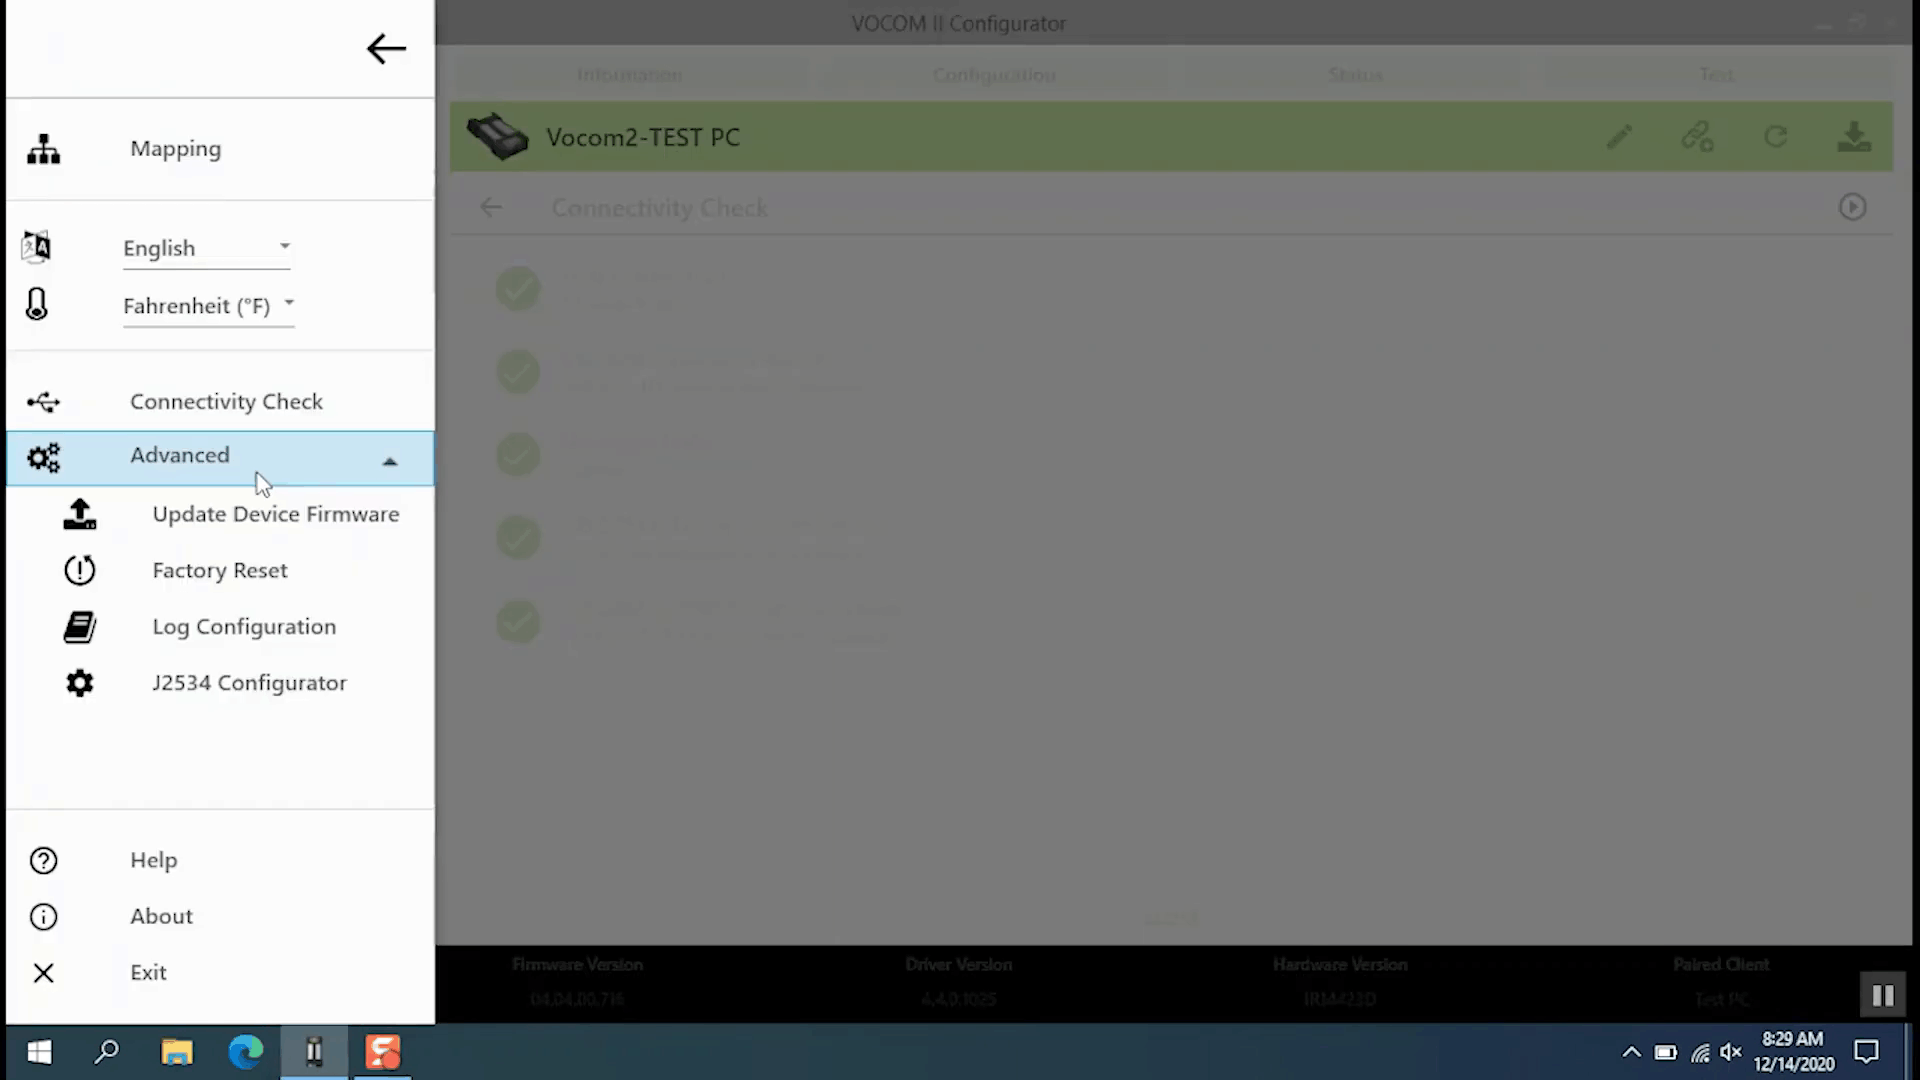
You can change the language displayed and whether the temperature of the device is displayed in Fahrenheit or Celsius. There is a connection test to make sure the computer is communicating properly with the vocom device in the advanced settings.
In advanced settings you can do it manually.
You can manually update the device’s firmware. You can perform a factory reset to erase all devices with saved settings, including paired computers. Note that you can also manually perform a factory reset of a device while the device is connected to power by pressing and holding the reset button for about 5 seconds.
Then the light will flash Disconnect the device from all power to complete the reset? Finally, advance settings can also change the logging level of the device. Note that you should only modify this when instructed by the service desk.
Thanks for watching.
:: بازدید از این مطلب : 387
|
امتیاز مطلب : 0
|
تعداد امتیازدهندگان : 0
|
مجموع امتیاز : 0
تاریخ انتشار : چهار شنبه 16 شهريور 1401 |
نظرات ()
Is it true that Jaguar and Land rover Pathfinder will be shut down in April?
Yes Topix cloud diagnostic only from April.
With Topix cloud you can do only diagnosis, no programming modules and so on. Just basic things.
The cracked version should still work. You can’t update anymore, they have new software engineering mode and will replace the functions- “Pluto” Only dealer can do now, they didn’t release for public, same as Mercedes’ policy. All diagnostics are going this way. Volvo is already online, many others will follow. JLR SDD is separate from Pathfinder so vehicles up to 2016/17 will still be OK.
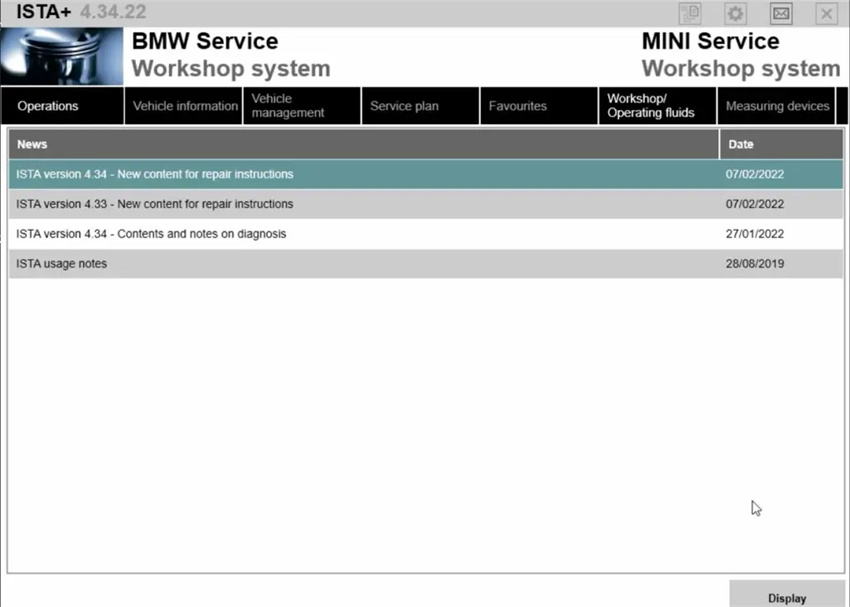
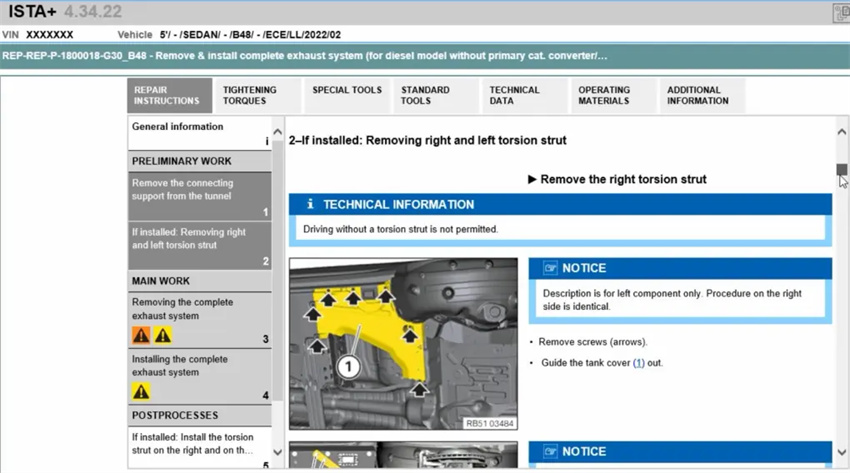
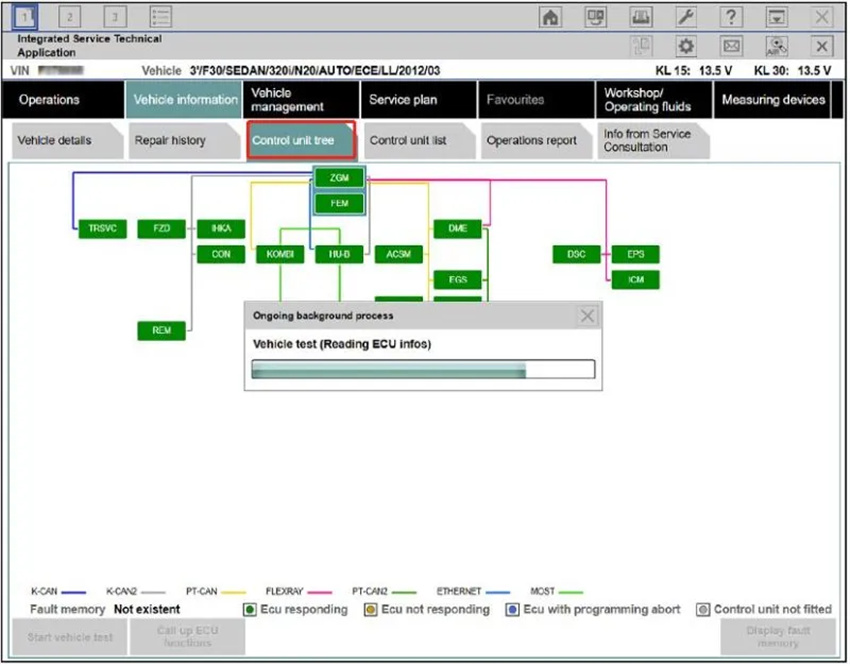
The ISTA-D Rheingold software available on this website allows full diagnosis of BMW E and F series vehicles. How to install ISTA-D BMW with 3.43 Rheingold standalone patch?
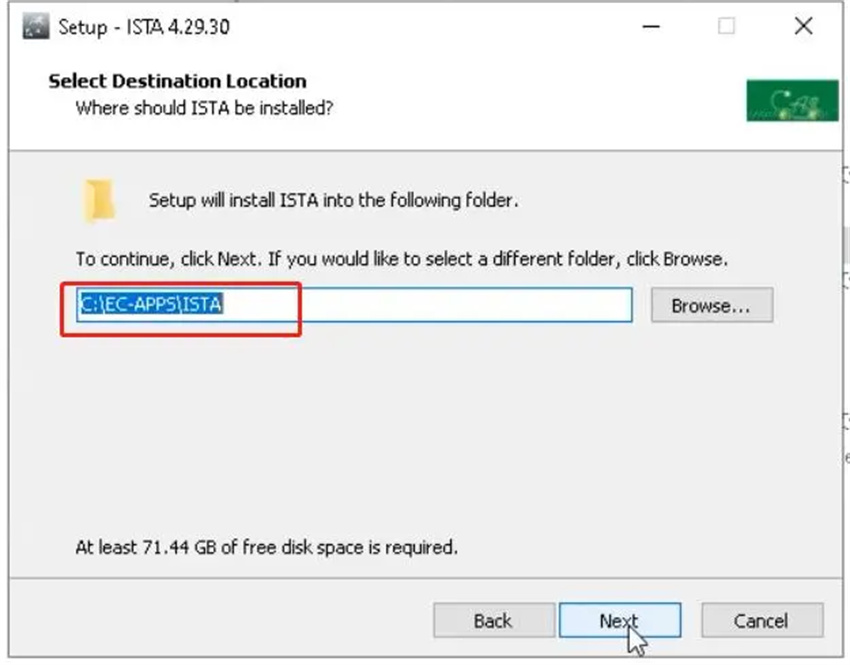
1.BMW ISTA download (143Gb) to your local laptop – download the installation package from the link at the beginning of this manual; – after downloading the package, right-click on it> Properties and in the window that will appear, check if there is no “Unzip” button in the lower right corner. If there is one, it must be pressed. Otherwise, after unpacking the files, some of them will be blocked and the program will not work. 2.Computer installation requirements: Windows 10/Windows 11 Running memory: 6G-8G Disk space: more than 110G, PSDZ database 300G (can choose to install) CPU: Main frequency 2.0Hz or higher 3.Remote system patches and activation support from us if you have paid for the ISTA 4.34
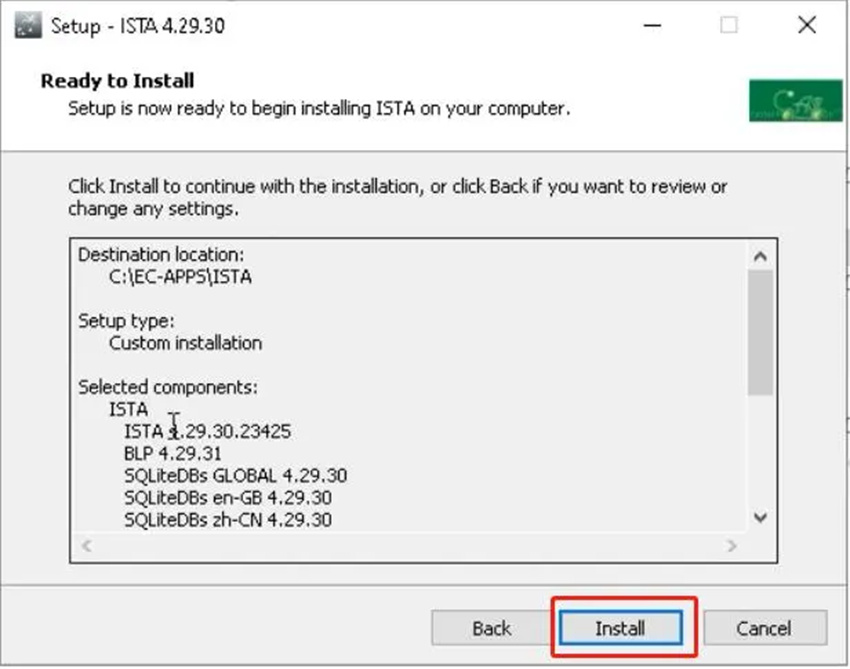
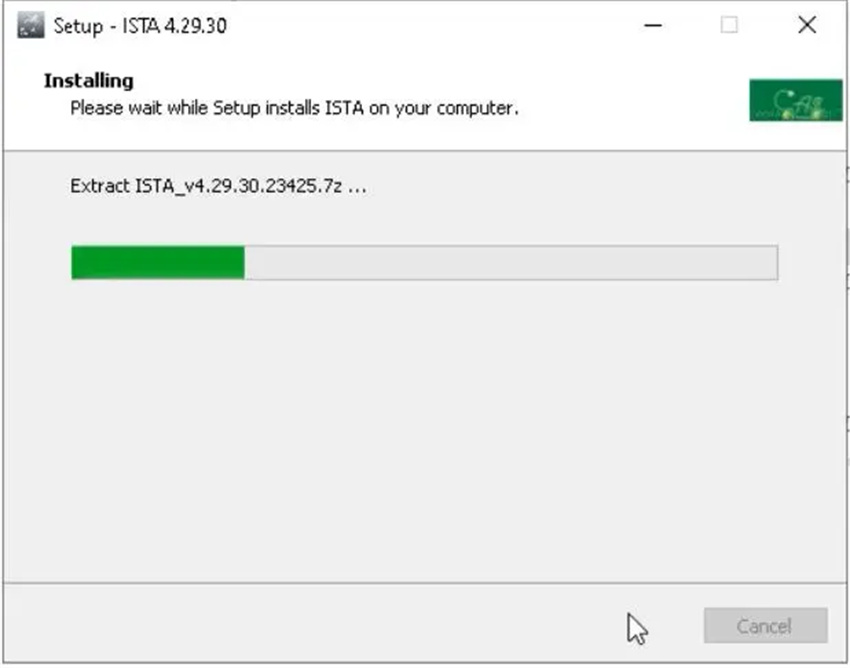
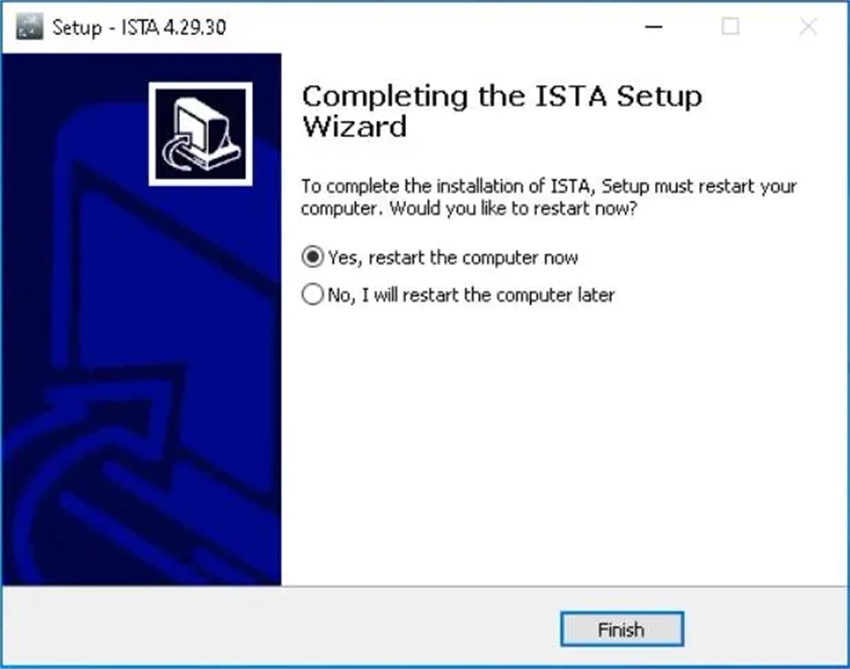
Note: for ISTA P, you still need to download the Psdzdatabase ISTA-D BMW Installation Process
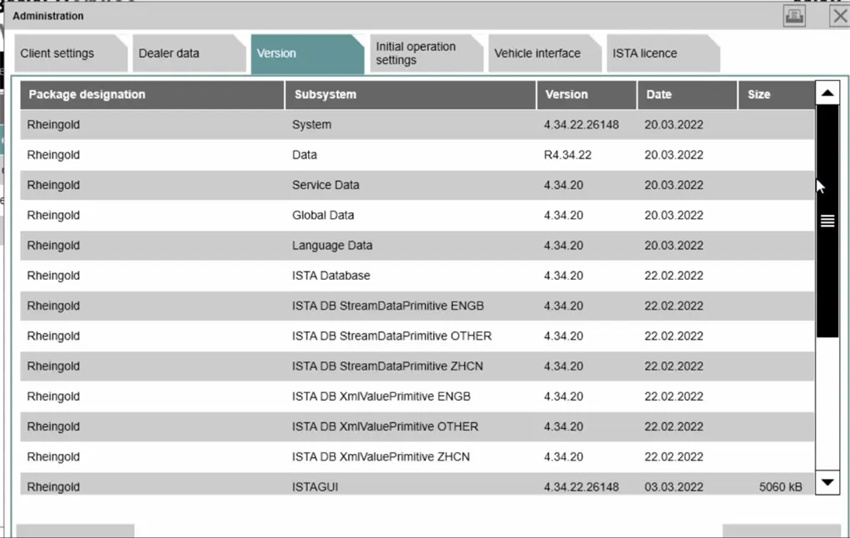
ISTA-D BMW System V4.34.22
For more questions about BMW, please click: BMW ICOM NEXT